Figure1. Choosing the Control Panel
1. General
1.1 After finishing one face model, do I have to launch the program again?
Yes. Simply restart the program. Use one by one strategy..
1.2 How can I set environment variables?
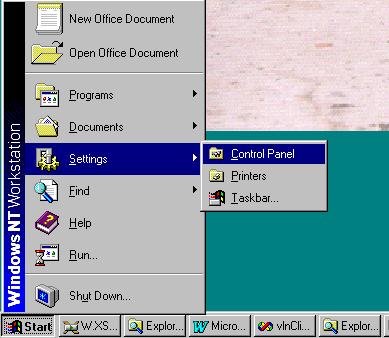
(1) Just to remind you, there are three environment variables related to the softwares. They are FCLONE_DIR where the programs are located("D:/Temp/MDome", for example), MDOME_PATH which is the same as FCLONE_DIR, and PICTURE_DATA_PATH which specifies the location of picture images and face models. Refer to the FaceCloner user manual and CloneAging user manual for more details. Go to the 'start' button in the button left of the screen and choose 'Settings'-'Control Pannel'.
Figure1. Choosing the Control Panel
Double click on 'System' icon. to bring 'System Properties' dialog box appear(Figure2).
(2) On the System Properties dialog, choose 'Environment' property page. You will see predefined variables in the two list boxes in Figure. You can add other variables by typeing in 'Variable' and 'Value' edit boxes. Make sure to PRESS 'Set' and 'Apply' BUTTONS TO MAKE THESE VARIABLES EFFECTIVE. And then press 'OK' button to close the dialog box.
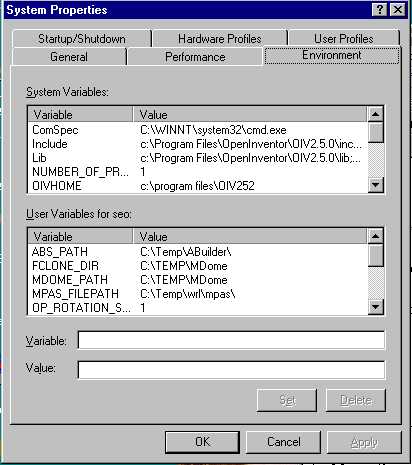
Figure2. System Properties Dialogbox
1.3 I cannot see the whole user interface for the aging program. What should I do?
This happens when the resolution of your screen is not high enough. You need to change the resolution of the screen in this case. Go to the control pannel (See 1.2) and double click 'Display' icon to bring up the 'Display Properties' dianlg box(Figure3).
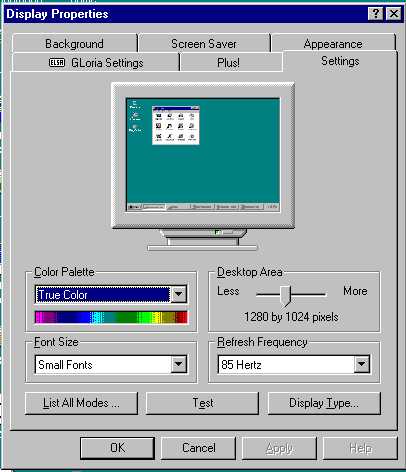
Figure3. Display Properties Dialogbox
1.4 I get 'Choose Pixel Format Error' followed by 'Dr Watson of WindowsNT Error'. What's wrong?
This normally means there are some problems in the system. Choose the fastest way in this case : USE YOUR BACKUP MACHINE.
1.5 Can I rename or relocate some of the directories under 'MDome' directory?
Nope. It is highly recommended that YOU DO NOT CHANGE ANY DIRECTORY
STRUCTURE OR EVEN
NAMES.
2. Using the progarm
2.1 How and where do I save image files?
With your KODAK camera, you transfer images through cable connection
between the camear and the computer.
CONSULT KODAK CAMERA MANUALS FOR DETAILS.
2.2 The image transfer doesn't work. What's wrong?
There can be many reasons, but one of the most probable reason is because the camera is turned off. MAKE SURE TO TURN ON THE CAMERA DURING THE IMAGE FILE TRANSFER.
2.3 How do I launch the program?
Simply double click on the 'face.exe' icon in 'MDome' directory. By default, you will find the shortcut to the program in the desktop area, though.
2.4 I can't launch the program. What's wrong?
Most probably you didnot set environment variables correctly. Check environment variables.(See 1.2)
2.5 How do I speficify the license file?
When you launch the program for the first time, it will requre you to specify the license file(Figure 4). The license file 'license.dat' is located in the same directory as the softwares. DO NOT TRY TO MODIFY THE LICENSE FILE. IT MAY CAUSE A SERIOUS PROBLEM.
(1) Choose 'Specify the License File' radio button and press 'Next'.
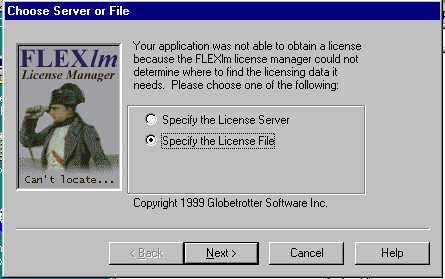
Figure4. Specifying the License File - step 0
(2) In the following dialoxbox(Figure5), press 'Browse' button.
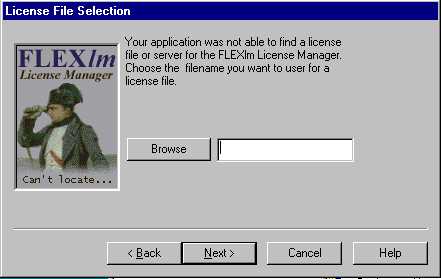
Figure5. Specifying the License File - step 1
(3) From the dialog box, select the license file 'licenseMD.dat'.
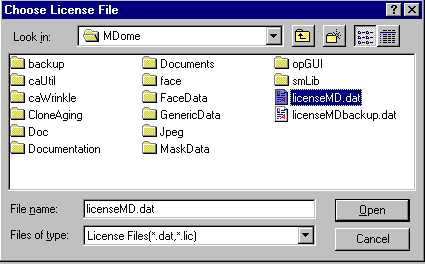
Figure6. Specifying the License File - step 2
(4) Press 'Finish' button to finish.
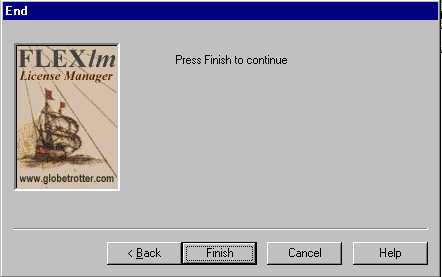
Figure7. Specifying the License File - step 3
2.6 The program crashes during the texture generation. What can I do?
This crash sometimes happens in the following occasions : When the images are too big or the locations of points are not as they are assumed. In the first case, try to resize the images using image processing tools such as PaintShop Pro. In the second case, you should move feature points in the 2D image window. THE TOP-MOST POINT IN THE SIDE VIEW IMAGE AND THE RIGHT-MOST POINT ARE IMPORTANT. These should be main feature points (yellow points), not other feature points. If non-main points are located as the top-most or right-most points, change positions so that main points replace them.
3. Visualizing ready-to-show models
3.1 Can I improve the quality of the model manually?
In fact, there are many ways to improve it. When you change the view
mode of the 3D window or the texture window, you are able to modify the
shape and texture coordinate points with left clicking/dragging the mouse.
Use 'Editing mode' in Figure8. Don't forget to save them afterwards.
Also, when are you showing them later, you should 'read' them.
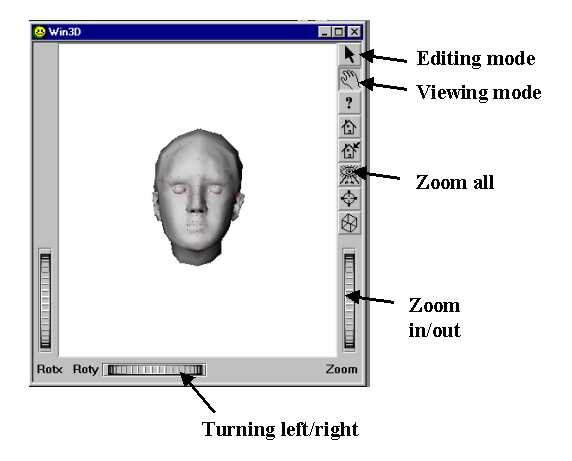
Figure8. 3D model window with different viewing and manipulation modes.
3.2 How do I show face models quickly?
Use the program as described above. And then, instead of moving feature
points, just read in the saved 'coord' file. In texture generation stage,
uncheck the 'image mosaic' check box in the 'Texture Manager' frame before
clicking 'Texture Mapping' button. Don't forget to turn on the light, of
course.
 |
MIRALab, University of Geneva
seo@cui.unige.ch,wslee@cui.unige.ch Director : Nadia.Thalmann@cui.unige.ch |