ITI 1120
Working on your own computer:
To work on your own computer,
you will need:
- The Java
Standard Edition, Java Development Kit (JDK), the
latest stable version (no need dor NetBeans, EE,
etc.)
You should also get:
- The “Dr. Java”
development environment
Any program that can create
text files (even Notepad) can be used as a text editor to create Java programs,
as long as you have the Java Development Kit. However,
many people prefer using an application intended to create program files
because they can be set up to do proper code indentation automatically, and
even compile and run programs directly from the editor. The
“Dr. Java” environment is installed in the labs, and is recommended because
it has enough features to make it useful, but not so many that it is difficult
to use. Plus, it is available at no charge.
If you have some prior experience,
your major is computer science or software engineering, or you intend to
do lots of programming in the future, you may wish to also see the power
users section.
Contents of the
CD included with the Textbook
If you purchased the recommended
course textbook (or another Java book), it might include a CD with the
Java Development
Kit. Insert the CD into your CD drive, and a window
will appear automatically.
It would allow you to install
JDK, the “Java Development Kit”. When you click
install, the installation program will help you install the software. See below for more information about the Java development
kit.
It might also prompt you
to install the “jGrasp” environment (or another
environment, possibly including Dr. Java). This software
provides an editor for entering Java programs, as well as additional features. You can install and use this software if you wish, but
this software will not be installed in the labs, and you are on your own
for learning how to use it.
The Java Software Development
Kit (JDK)

The Java system used in
the labs for ITI 1120 is the Java 7 Platform Standard Edition. To create programs, you will need to get the Java Development
Kit (JDK). The documentation is available on-line,
but if you want to view the documentation off-line, it can also be downloaded. There is no charge for the use of this software or documentation.
If you work on
your own computer, be sure that your programs will run on the machines in
You should be aware that
there is some confusion with the version numbers and terminology of Java
installations. When going from the previous Java version
1.4.2 to the “next” version, the new version has been identified as both
5.0 and 1.5.0. This page will use 5, 6 or 7 as
the
version number. Also, the terms SDK (Software
Development
Kit) and JDK (Java Development Kit) have been used interchangeably; at present,
the current preferred term is JDK.
Use a recent JDK version available on line. The version on the CD in the text book is OK too. The JDK download file is a big file; a high-speed connection is highly recommended to download the file.
·
On that page,
scroll to SDK the latest stable version , and click on the download link (a version without
Bundles, NetBeans, EE is sufficient).
Any JDK > 5.0 is OK too.
The download file is a self-installing
executable (.exe) file. If your system will automatically
execute such files, most of the work will happen automatically. If your system does not automatically execute downloaded
files, you will have to follow the complete procedure described in the installation
instructions. In either case, read the instructions
carefully so that your system is set up to compile programs easily. If
you can type javac or java at a command line prompt and
a list of options is given, you have installed everything correctly. If you get a message similar to “javac
is not recognized as a command (etc.)”, then the installation is not complete,
and you should check if the installation instructions was done correctly.
Java JDK documentation
There are two types of documentation: the Application Programmer’s Interface (API), and technical documentation about the JDK. The Application Programmer’s Interface is the documentation you will most likely use: it has descriptions of all the pre-defined classes and methods that come with Java. Both types of documentation are available on line. Unless you expect to be working off-line frequently (for example, on a portable computer), downloading the documentation is not necessary.
· View the Application Programmer’s Interface (API) documentation.
·
View the complete JDK documentation.
- To download both sets of documentation, click here to go to
the Java Development Kit download page. On
that page, scroll to JavaSE Documentation. Click on “download”. The
download file is about 52 Megabytes in size, and you will need an
additional disk space to unzip it.
The Dr. Java environment

Also available free of charge
is “Dr. Java” environment, the editing environment provided in the SITE computer
labs. Click here to go to the “Dr. Java”
web page.
Once you are there, you
will have three download options. The recommended
version is the “Windows App” (the .exe file). Download the file and make sure
to remember where you saved it on your computer. Alternatively,
you can download the .jar file (much smaller) that works if the Java Virtual
Machine is already installed and accessible on your machine.
If you have already installed
the Java software development kit, you should be able to start the Dr. Java
environment by double-clicking on the icon of the file that you saved.
If you installed the latest
stable version, when Dr. Java starts, you should see a window similar to
the following:
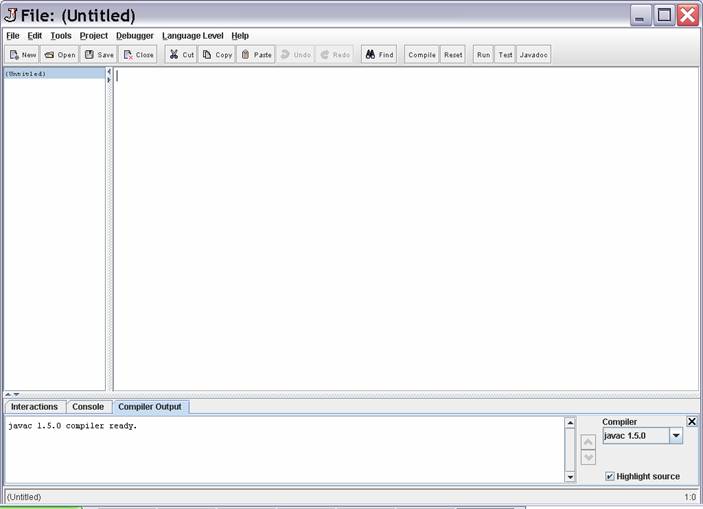
The first time you run Dr.
Java, you may be asked to locate the directory in which you installed the
Java Development Kit (JDK), or specify the location of a file called tools.jar. For example, the Java JDK
(update 21) might be installed in the default location
of
C:\Program
Files\Java\jdk1.6.0_17
then the tools.jar file will be in
C:\Program
Files\Java\jdk1.6.0_17\lib.
If you installed the JDK somewhere else,
then locate the tools.jar file in a folder called lib contained in the directory where you installed the
JDK.
You may not see the line numbers; if you want to turn them on, click on the Edit menu and select “Preferences”. In the categories area, click on “Display Options” and then check the “Show all line numbers” box.
For “power users” only:
If you have some prior experience
(surfing the web or downloading MP3 files doesn’t count!), you may wish to
use a more advanced environment. An "integrated development environment"
(IDE) contains a collection of tools that can help you enter, run, document,
test, and debug programs.
A full-featured IDE for Java is called "Eclipse". It is
installed in the
This IDE is recommended only for
students with prior programming experience, and who intend to do serious
programming some day. If you want to download it for your own computer, be warned
that it is over 105 Mb in size, and will take a very long time to download
unless you have a high speed connection. You are also on your own to learn
how to use it! (Eclipse comes with a tutorial and many help files.)

All software mentioned on this page is available for free download. Please
read the license agreements for terms of use.
Return to the ITI 1120
home page