
SEG
2105 Lab 1/ Assignment 1: Getting Started
A brief discussion &
An introduction to the EclipseIntegrated Development Environment
Note: the following images come from Eclipse 3.2, but it the lab has been tested in versions of Eclipse up to 4.2 (Juno).
** Extracted from "Object-Oriented Software Engineering: Practical Software Development using UML and Java",
2nd edition by Timothy C. Lethbridge and Robert Laganière McGraw Hill, 2004.
A Java method enabling performance analysis of code: currentTimeMillis()
import java.io.*;
...
//currentTimeMillis() returns the difference, measured in milliseconds,
between the current time and midnight, January 1, 1970 UTC
long startTime = System.currentTimeMillis();
...
long stopTime = System.currentTimeMillis();
long elapsedTime = stopTime-startTime;
Please begin and familiarize yourself with the following steps:
-
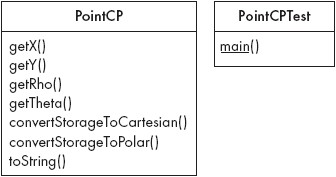
Download (Right click/Save As...) the java files PointCP.java and PointCPTest.java to a specific directory you wish to work from (e.g. LAB1\).
- Start up Eclipse using the windows start button. Find the Eclipse application in the list of programs.
-
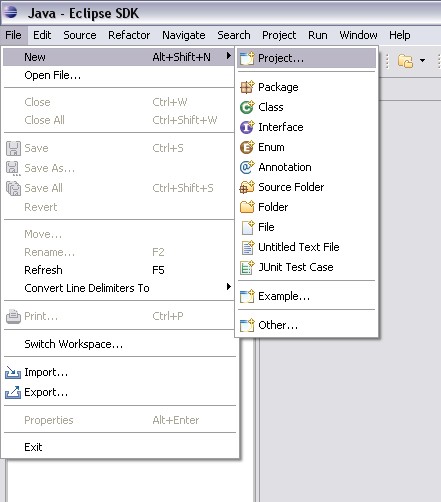
Go to File, New -> Project.
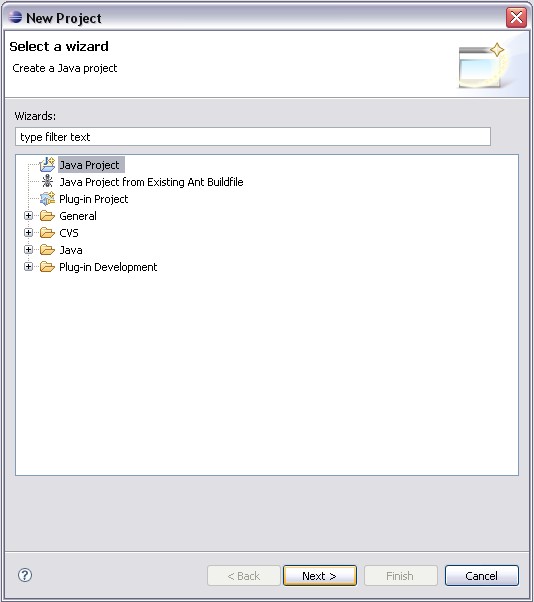
- Select Java Project and click Next.
- Call your project 'lab1' and 'Create project from
existing' browsing to the working directory your created in step 1.
Click next.
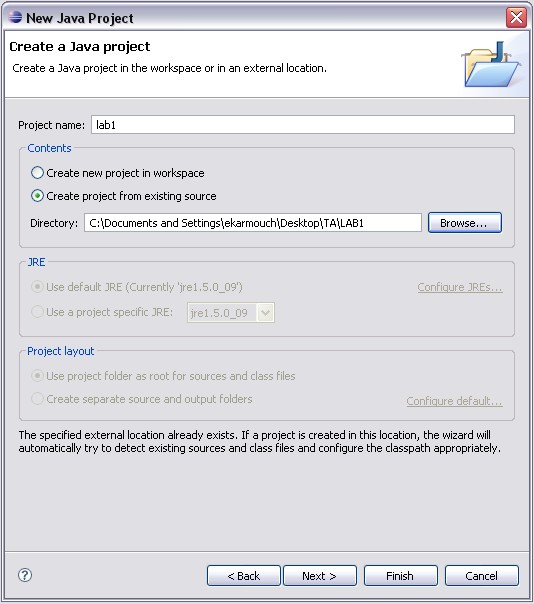
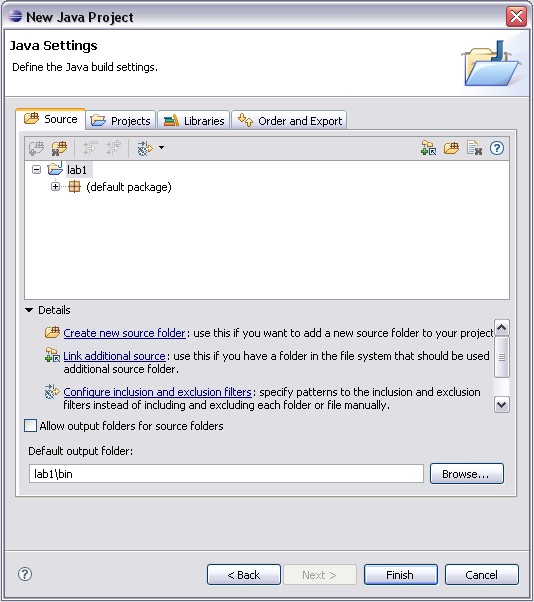
- In the next window, you are able to modify the output folder as shown below and click Finish.
(You don't have to, but I like to separate source and compiled code, so I set the output folder to be 'lab1\bin')
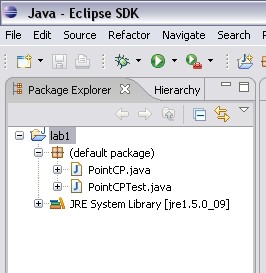
- You should now be in your editing environment. If you
expand the folders shown bellow within the 'Package Explorer' window,
you should see your respective java files.
- To run the code, select the Run option from the menu bar, then the 'Run...' option under that.
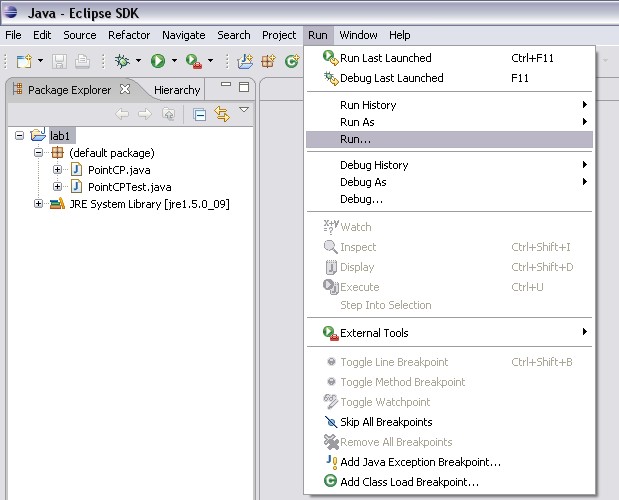
- Next, click Java Application on the left panel, and click the 'New' button at the top left.
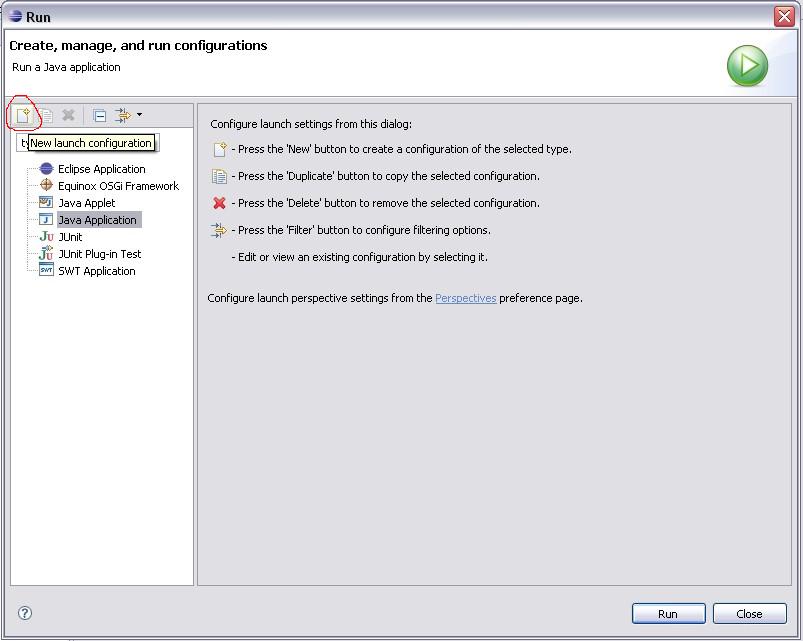
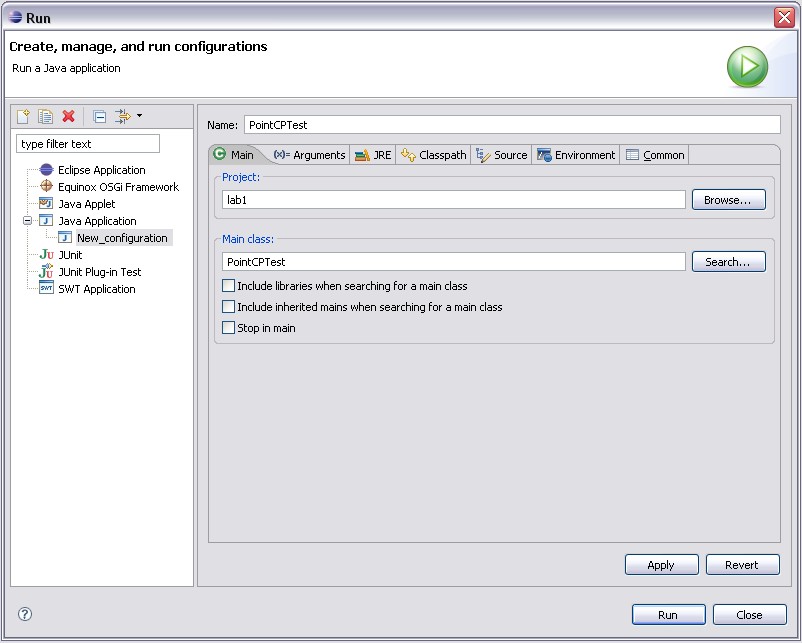
- The 'Run' window will appear. Fill in the information corresponding to your main class (i.e. the class to run).
- The program will run in a little window (i.e. console) at
the bottom of the screen as part of the IDE. If you want to run the
program again, you can click the toolbar button showing a play button.
Your run configuration will be displayed as an option.
- Proceed to the lab1 instructions